Wednesday 4 February 2015

Finished Hornet

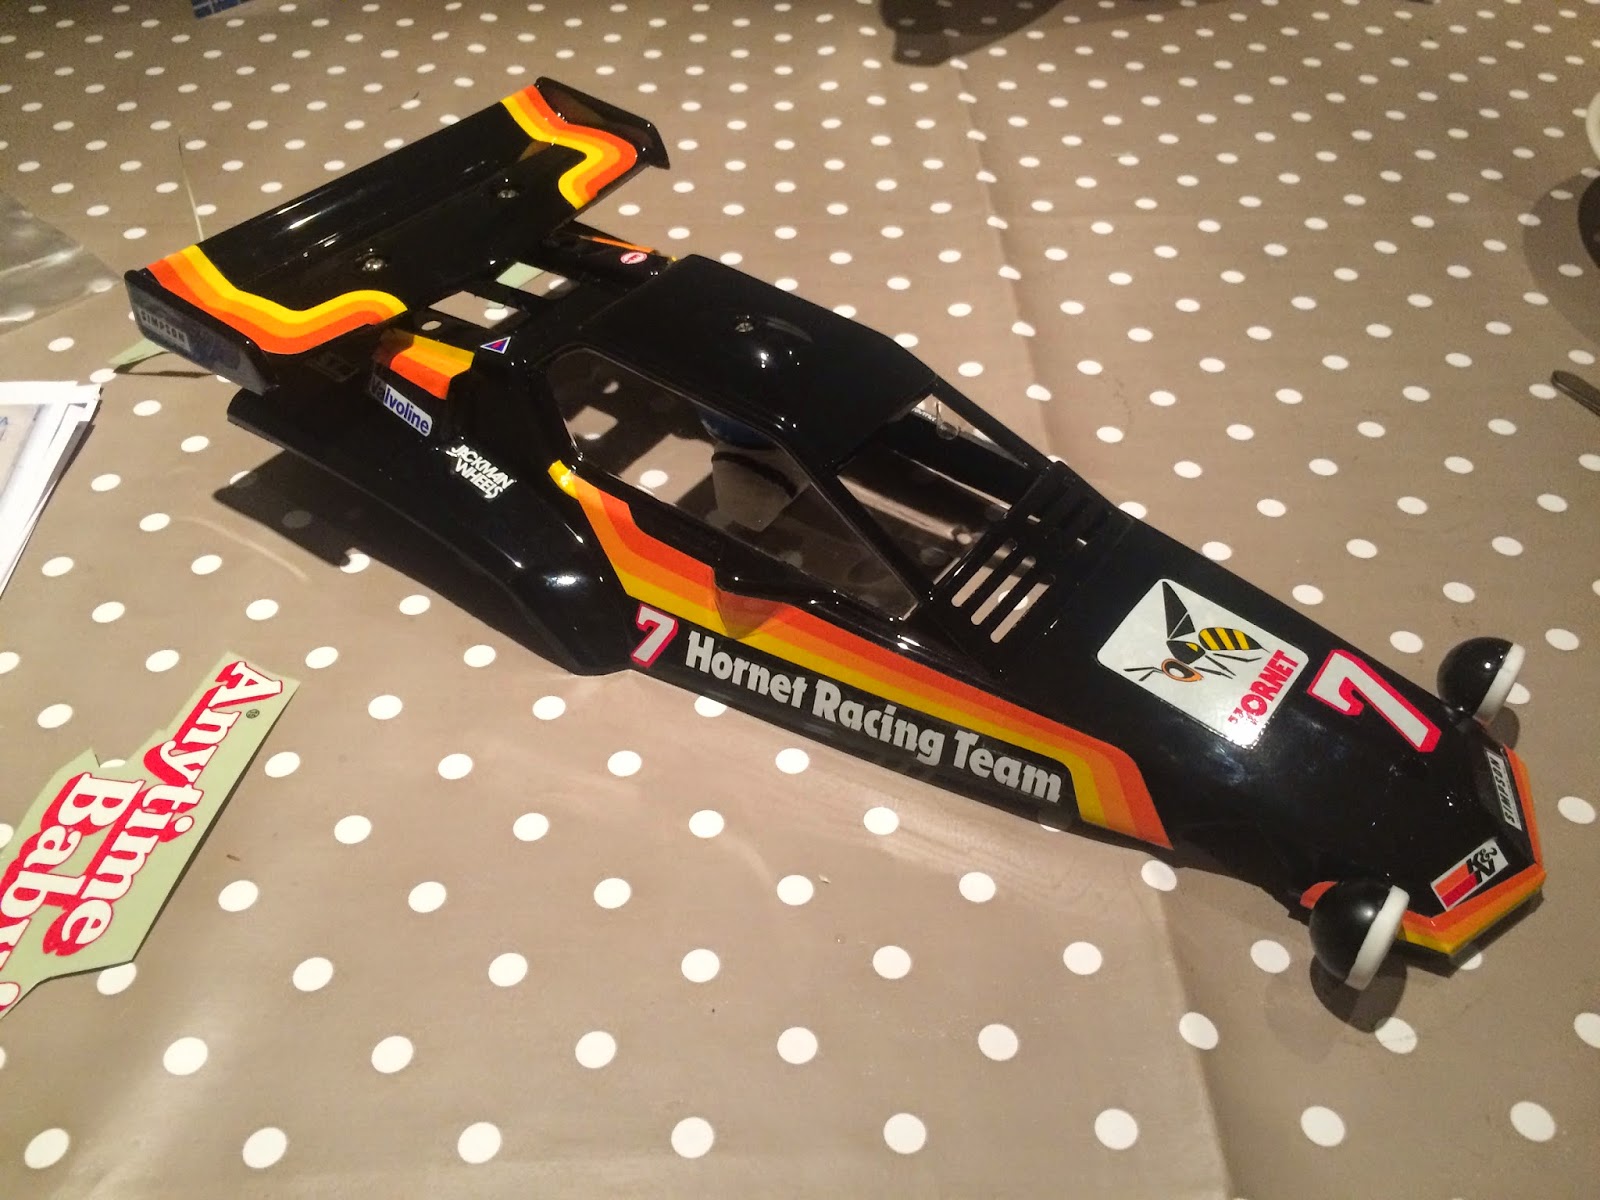
I have finally had a chance to sit down with the Hornet and get the decals done.
As mentioned before these are the Original Hornet Stickers so needed to be cut to shape.

It took a little while but I'm really pleased with the end result.  So here we go!


Doing all the stickers took a couple of sittings.  Purely for my sanity!  But I got there in the end.  
The last stage was painting the silver strip alongside the side windows, I often see Vintage Hornet's that haven't had this done!  So the next set of pics marks the end of this restore.  Thanks for reading!


Monday 19 January 2015

Hornet Stickers & LB Update

I have finally found some reasonably priced Original Hornet stickers. :)
I have started work on applying these and will take some pics as I do.

The LB restore has begun, I'm going a little different with this one though.
It came with some of the Silver Plated Midnight Pumpkin wheels and the previous owner had added the 3rd shock mod to the back.

So for starters I have improved on his work and put the same shocks all round so that it all matches and fits in with the 'Metallic' Theme.  I'll continue this with the body in some way but using original stickers.  But more to come on that as I progress.

Friday 12 December 2014

Grasshopper II Rebuild

I recently bid and won on a Lunchbox & Grasshopper II.

Both are vintage originals so i thought I would start on the GH2 whilst I wait to get some original stickers for the Hornet.

As you can see by the picture below it was in a bit of a state and had no rear axle.
So that and a bearing kit were a required purchase.


Whilst waiting for them to arrive I stripped the chassis down and started cleaning up the parts.  And rusty metal parts were put in clear vinegar for a couple of days.

Unfortunately the previous owner had chosen to paint the wheels black.  Even worse was they hadn't used acrylic paint like they had on the driver.  A dip in brake fluid stripped the driver down really well.  But the wheels were a b!tch!

Unable to find any replacements I persevered as much as I could but had to result to spraying them white in the end.  Not ideal but as you can see alot better than they were.


The scrubbed up fronts and the rears before I started on them.


 The fronts after being sprayed white.


Whilst working on the wheels (rears took ALOT of work) the axle and bearings arrived so I could continue with the build.  
This was a nice simple project ahead of the one I am really looking forward to ...The Lunchbox!!! :)


Saturday 22 November 2014

The Hornet - Body

Now that the Hornet was back together and in good shape it was time to sort out the shell.  Annoyingly I couldn't find an original shell so opted for a Re-release.
As far as I can tell the main difference with them is the back window.  This needed to be cut out to cater for the heat shield for the speed controller.

Once this was done I masked up the windows and applied a couple of coats of black spray paint.  I'm pretty pleased with the outcome and having the shell on (although without stickers) it really brings back the memories of my original hornet.  Although I think this will be more so when the driver and headlights are on!!


Friday 14 November 2014

The Hornet - Update 2

I  have been moving forward with my Hornet rebuild, now that I had the new shaft for the rear gear box I was able to put everything back together.  I stripped the shocks down and cleaned them up.  The rears got new oil added before fitting back onto the chassis.

The next stage was sorting out the wheels.  As you can see below they were in pretty bad shape.

First thing to do was strip them down, take the tyre off and clean them up.  Once this was done I got a small file and proceeded to file down the rough edges.  By filing up away from the center I slowly managed to remove the scraped edges and bring the wheel to a pretty good finish.

This is the same wheel as the first picture cleaned up, filed down with new metal bearings and a new tyre.  I did the same to all wheels but haven't added new tyres to the rear yet.
Here are a couple of pictures of the chassis rebuilt and wired up with the cleaned up wheels.


Wednesday 29 October 2014

The Hornet - Starting the Rebuild

Now that the parts were all cleaned up and the metal bearings installed it was time to start putting my project back together.
This started with the install of the servos and front suspension arms.  Really I should have been mounting the rear gearbox but the shaft for this was bent on arrival so I was waiting for the new one to arrive.

Turns out I didn't need the battery pack as the ESC that came with it was new enough not to need one.

For now I have decided to keep the original bumper, but have glued up the broken part in the middle.

As you can see the original shaft had taken quite a wallop to cause that bend!

1st Restoration Project - Tamiya Hornet

Ok, so my first R/C restore takes me back to my youth.  My first proper R/C was the Tamiya Hornet.
Unfortunately it met a bit of a grizzly end so thought it would be a good project to start with.

Keeping an eye on Ebay there were a few coming and going in various conditions.  Some I let pass as they were in pretty good shape.  I wanted something I could really work with.

Finally I found it, as sold as seen Hornet with no shell.  Untested but had servos and a speed controller.

Here are the original pictures from the listing:


So as you can see it looks to be in 'working' condition but pretty tatty.  Just what I was looking for.
Once it arrive I basically stripped it down completely:


Stripping it down highlighted some broken suspension parts, a crack in the bumper and a bent shaft for the rear gearbox.  Nothing major but will need addressing none the less.  Also alot of the metal parts and screws had signs of rust.  So my first step was to put these into white vinegar for a day or so then scrub them up.  This worked a treat as you can see below:

The next few days were just spend cleaning up the parts.  Using wet wipes to clean up the plastic parts and the white vinegar on the metal parts.  I wanted to get rid of all the dust, dirt and grime.  I also ordered some metal bearings to replace the plastic ones in the gearbox and wheels.  I installed these and made sure all the cogs were lubricated.  But to be fair they were in really good shape.